Under Control
By Paolo Benedetti
 Striving to avoid anything that might compromise the visual integrity of his projects, Paolo Benedetti is always on the lookout for ways to conceal drain heads, skimmer lids and other undesired intrusions. Here, he takes aim at spaside controls, describing a quick, effective means of removing them from view by hiding them in a niche topped by a lid made from the same material as the coping or decking that surrounds the spa.
Striving to avoid anything that might compromise the visual integrity of his projects, Paolo Benedetti is always on the lookout for ways to conceal drain heads, skimmer lids and other undesired intrusions. Here, he takes aim at spaside controls, describing a quick, effective means of removing them from view by hiding them in a niche topped by a lid made from the same material as the coping or decking that surrounds the spa.
One of my pet peeves is the thoughtless use of products such as skimmer and deck drains purely as they are supplied – that is, just as they come out of the box.
To be sure, we have no choice but to use these and other devices, fittings and fixtures in our project. What I can’t stand is placing them directly and uncritically into a project, basically because they have the potential to detract from the visual contexts I work so hard to create.
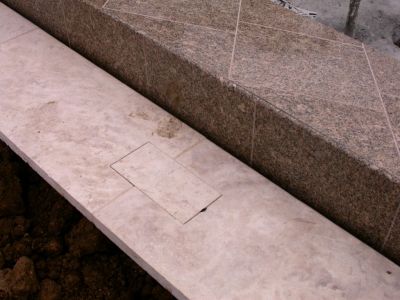
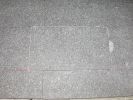
 A desire to avoid the visual intrusion of spaside controls has led us to develop a simple system for concealing them under small panels made of the same material as the surrounding coping or decking material.
By now, we’ve all seen wonderful treatments for stone skimmer lids and deck drains (courtesy of David Tisherman and several others who’ve written about them in WaterShapes through the years), so there’s no longer any excuse for installing ugly, plastic components where they just don’t belong. Besides being hideous to look at, they create distractions that, whether directly or subliminally, undermine a project’s visual integrity.
Extending on that thought, I have similar objections to placing control panels alongside spas. Adding to the distraction of the plastic keypad is a glowing LED or LCD display – not to mention the fact that ultraviolet radiation inevitably takes a toll on the keypads and displays. Then there’s the practical point that, left exposed, these visual nuisances are an open invitation to kids who can’t resist pushing buttons and the possibility that settings can be altered by pedestrian traffic or the errant elbow.
UNDER COVER
While some might see my attention to such details as being picky or even excessive, it probably comes as no surprise that I’ve come up with a way to conceal our spaside remotes. It takes a bit of planning, but it’s actually quite easy to do.


In construction, we create a small box in which we’ve placed two lines – one for the controller’s cables and the other a drain. When the coping is installed, my masons cut out a piece of the stone over the box. This piece will eventually become a lid we make fully functional by carving out a finger cup.
Within this utility box we terminate all of the line-voltage conduits from the equipment set, lighting systems, outdoor-kitchen fixtures and more. We may even install multiple vaults or simply get a larger vault if the project requires more than one panel. The conduits that provide the incoming power also run to this vault: Incoming conductors simply loop up into the control panel from there.
It all starts during construction, when we install two conduits to the desired horizontal location of the spaside remote. One conduit, usually polyethylene or drip-irrigation tubing a half-inch in diameter, is simply a drain line that runs to a pocket of drain rock underneath the spa or nearby decking. (The amount of water to be drained is minuscule). The second conduit carries the control wiring for the controller. (I typically use a one-inch-diameter conduit to make wire-pulling easier: The added cost of the larger material is insignificant relative to the time savings.)
When it comes time to install a coping system of either stone or concrete, my masons carefully cut out a niche of sufficient depth to allow the top surface of the spaside remote to sit just below the level of the finish material, allowing for the thickness of the lid we’ll fabricate to cover the keypad. (In many cases, the piece cut out of the coping material is used to make the lid.)
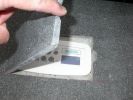
Once the masons are done, we cut the drain tubing flush to the “floor” for unimpeded flow away from the niche. Then we cut the wiring conduit down so that it stands about a quarter-inch proud of the floor and install the remote in the niche.
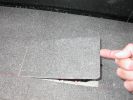
Just to be certain there’s no contact between the lid and the keypad, we grind away a portion of the underside of the lid. Then we grind a “finger cup” on the underside of the lid along with a matching detail on the coping.
Once in place, the keypad is both accessible and practically invisible. As I see it, for the limited amount of actual use keypad will see during its lifespan, there is no reason at all to leave it, exposed and visually intrusive, on the deck for all to see.
Royal Treatment
During the design phases of some of my projects, I go so far as to inquire about where my clients wish to place the king’s and queen’s thrones within their spas.
Once we stop chuckling about the question, we usually get into an earnest discussion of what they’ll see from these seats, the depth of these thrones in response to their physical dimensions and the placements of jets in these locations.
I also determine their right- or left-handedness and ask who is going to work the controls. Then we place the spaside remote to the right of the throne of the right-handed person who is to control the remote or to the left of a left-handed person.
This, I’ve found, is attention to detail that definitely sets us apart from the crowd.
